
How to Set Up Kiro Users in AWS IAM Identity Center
Kiro
Deep dives into Kiro-specific features as they ship: Automations, Skills, and other advanced capabilities beyond the 101 basics.
2 articles
Kiro is an AI-powered IDE. If you’re not familiar with it yet, in Kiro 101 I cover what it is and what you can do with it.
To use Kiro you need a user account. There are several ways to create one, but if your team already works with AWS, the most convenient is managing users directly from the console using AWS IAM Identity Center. This ties billing to your AWS account and access goes through SSO, no extra credentials needed.
In this tutorial I’ll walk you through the full process step by step. At the end I also cover how to add more users, check usage, and what happens if you cancel mid-month.
Got AWS credits? When you set up Kiro with IAM Identity Center, it shows up as a line item on your AWS bill. That means any credits in the account get applied automatically to the Kiro charge.
If you have credits to spare, it can end up being free.
Before you start: pick the region
Before doing anything, make sure you’re in the AWS Console in one of the regions where Kiro is available. As of July 2026, you can only set up Kiro with IAM Identity Center in N. Virginia (us-east-1) or Frankfurt (eu-central-1).
This matters because the region you pick is where your user data and Kiro configuration are stored.
If you need your data to reside in Europe, use Frankfurt. If you don’t have a preference or already have IAM Identity Center in us-east-1, use N. Virginia.
Step 1: Find Kiro in the AWS Console
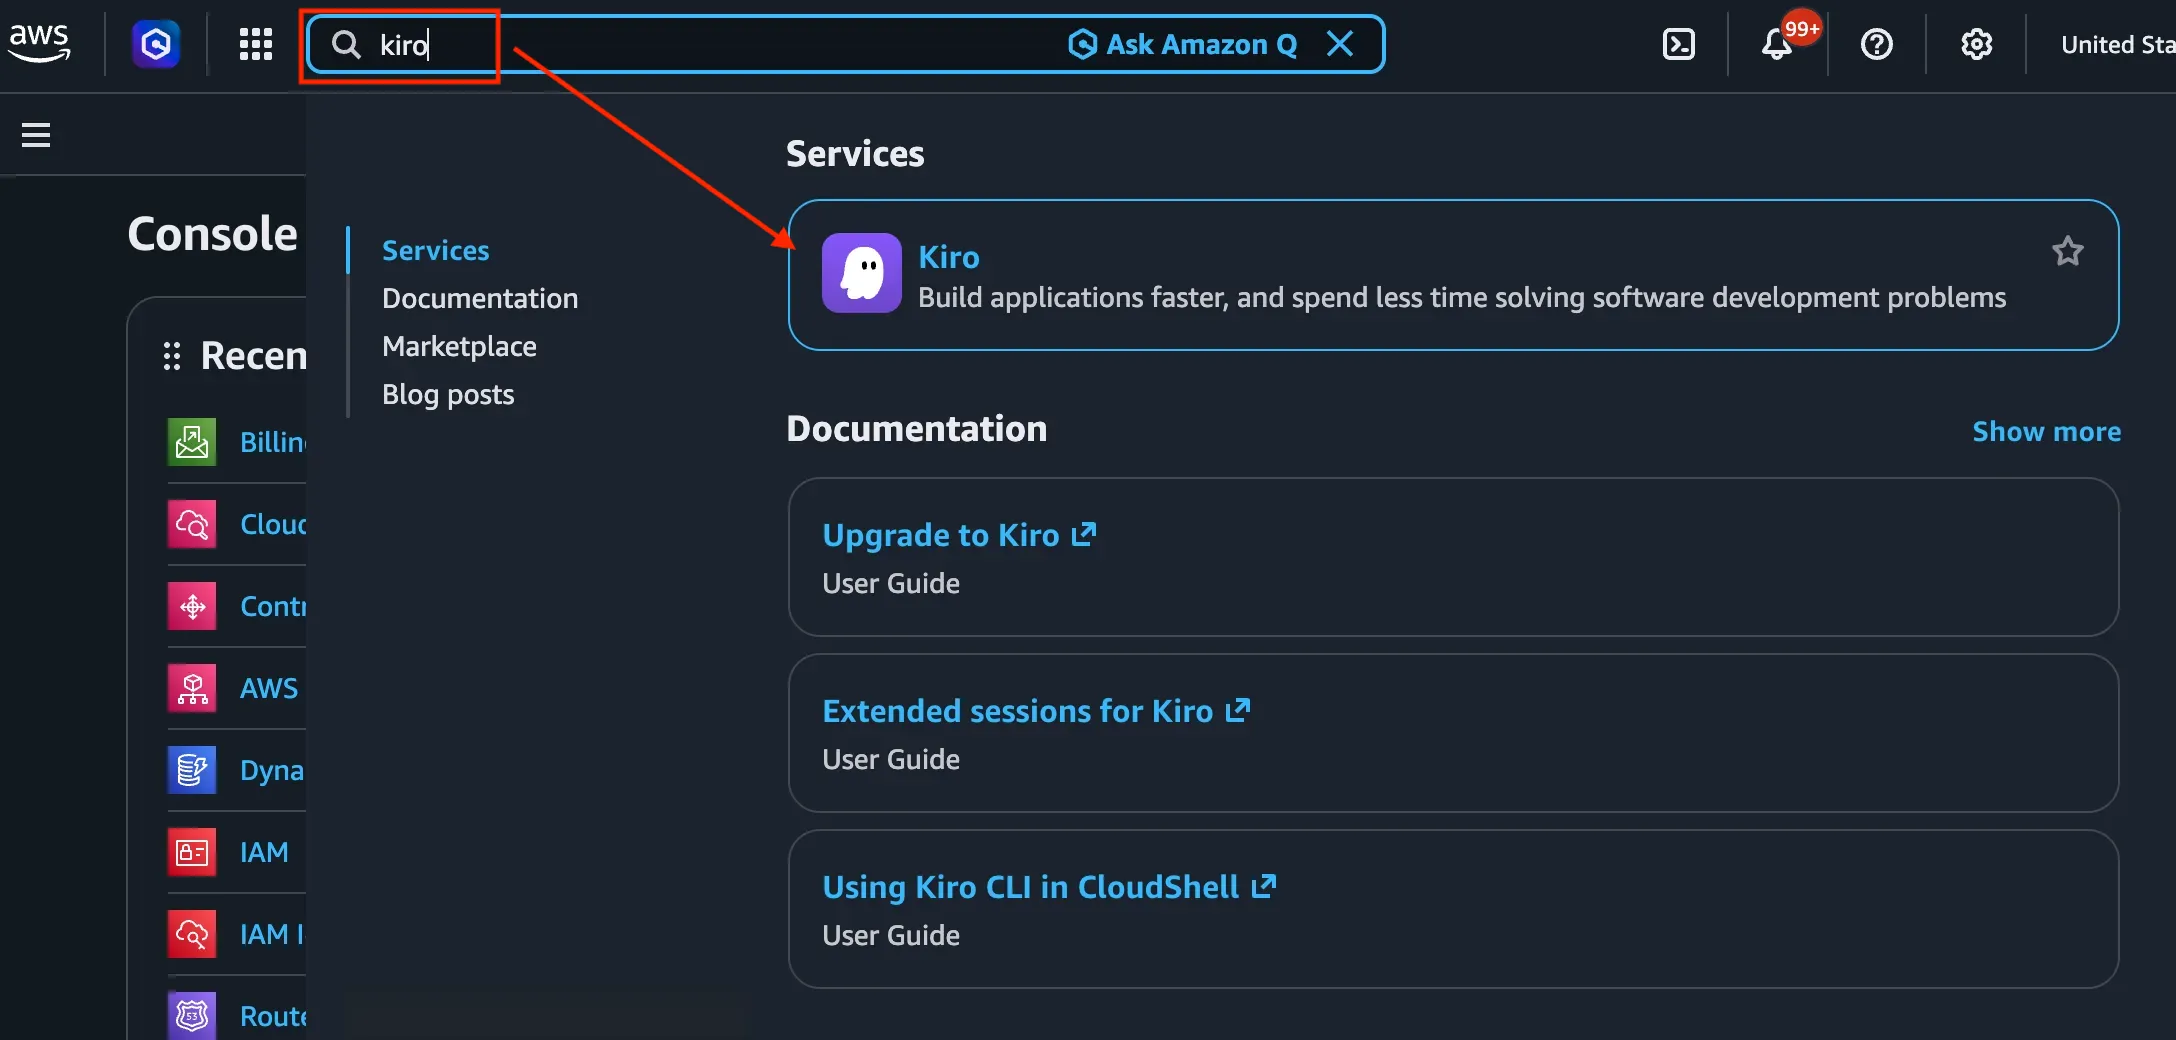
Sign in to the AWS Console with an admin account and search for kiro in the top search bar.
Step 2: Start the signup
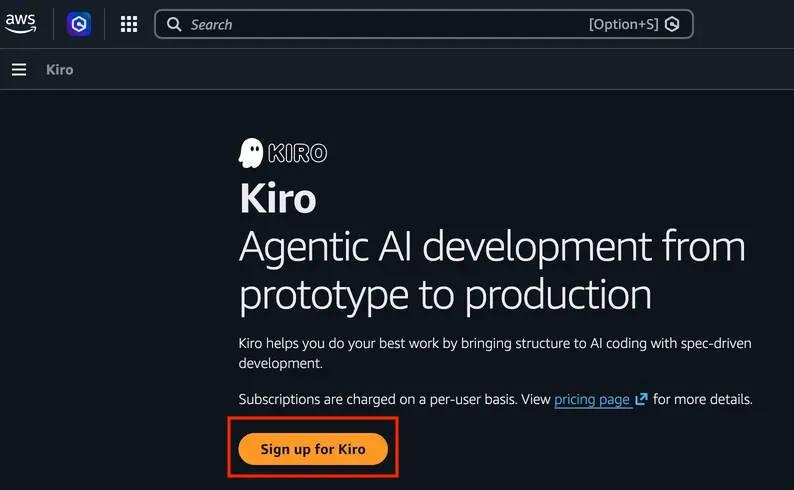
You’ll land on the Kiro page with the button to get started. Click Sign up for Kiro.
Step 3: Choose IAM Identity Center as the identity source
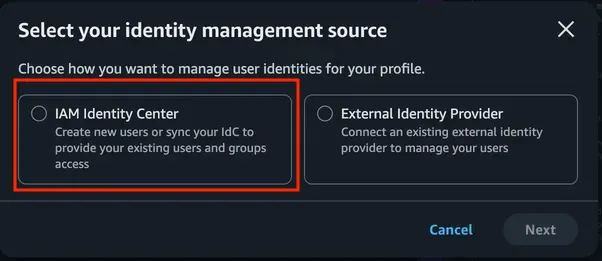
AWS asks how you want to manage the users who’ll use Kiro:
- IAM Identity Center: create new users or use existing ones. This is what we’ll use.
- External Identity Provider: for when you manage identities outside AWS (Okta, Azure AD, etc.).
Select IAM Identity Center and click Next.
If your account doesn’t have IAM Identity Center enabled, AWS creates it automatically at this step.
Step 4: Enable Kiro
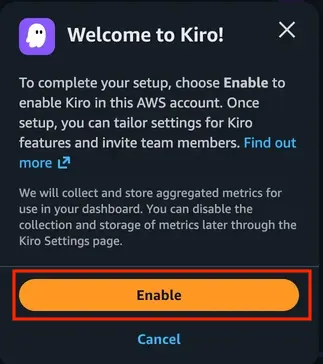
A confirmation dialog appears explaining you’re about to enable Kiro in this account. Click Enable.
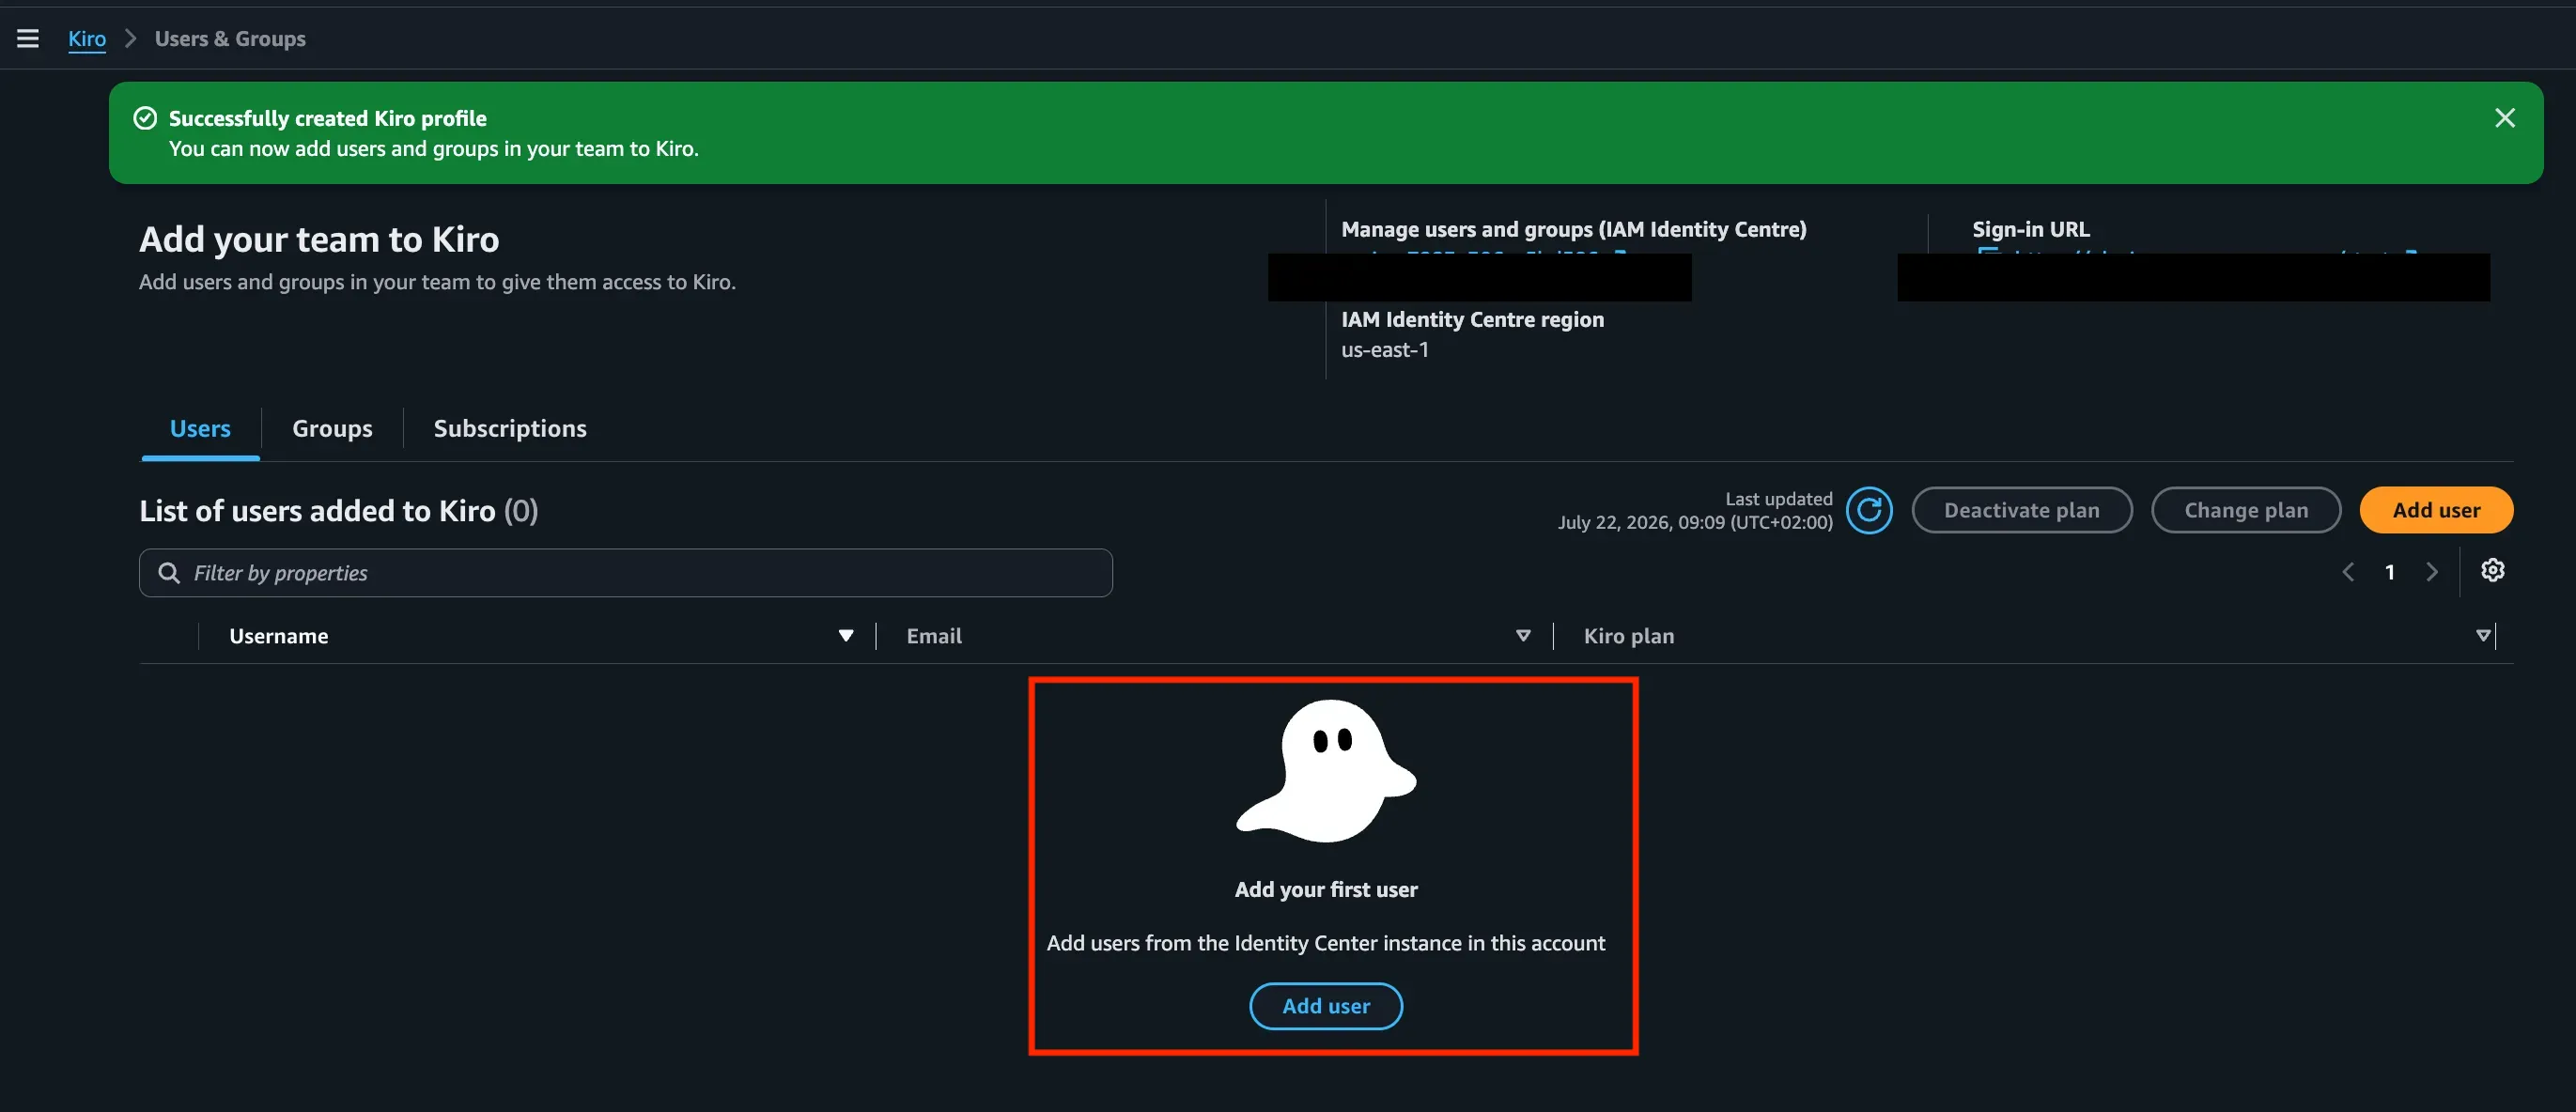
Once enabled, you’ll land on the main Kiro management page. From here you can add users and manage subscriptions.
Step 5: Choose a plan
AWS shows you the available plans (Kiro Pro, Pro+, Pro Max, Power), each with a different monthly credit limit. Pick the one you prefer and click Continue.
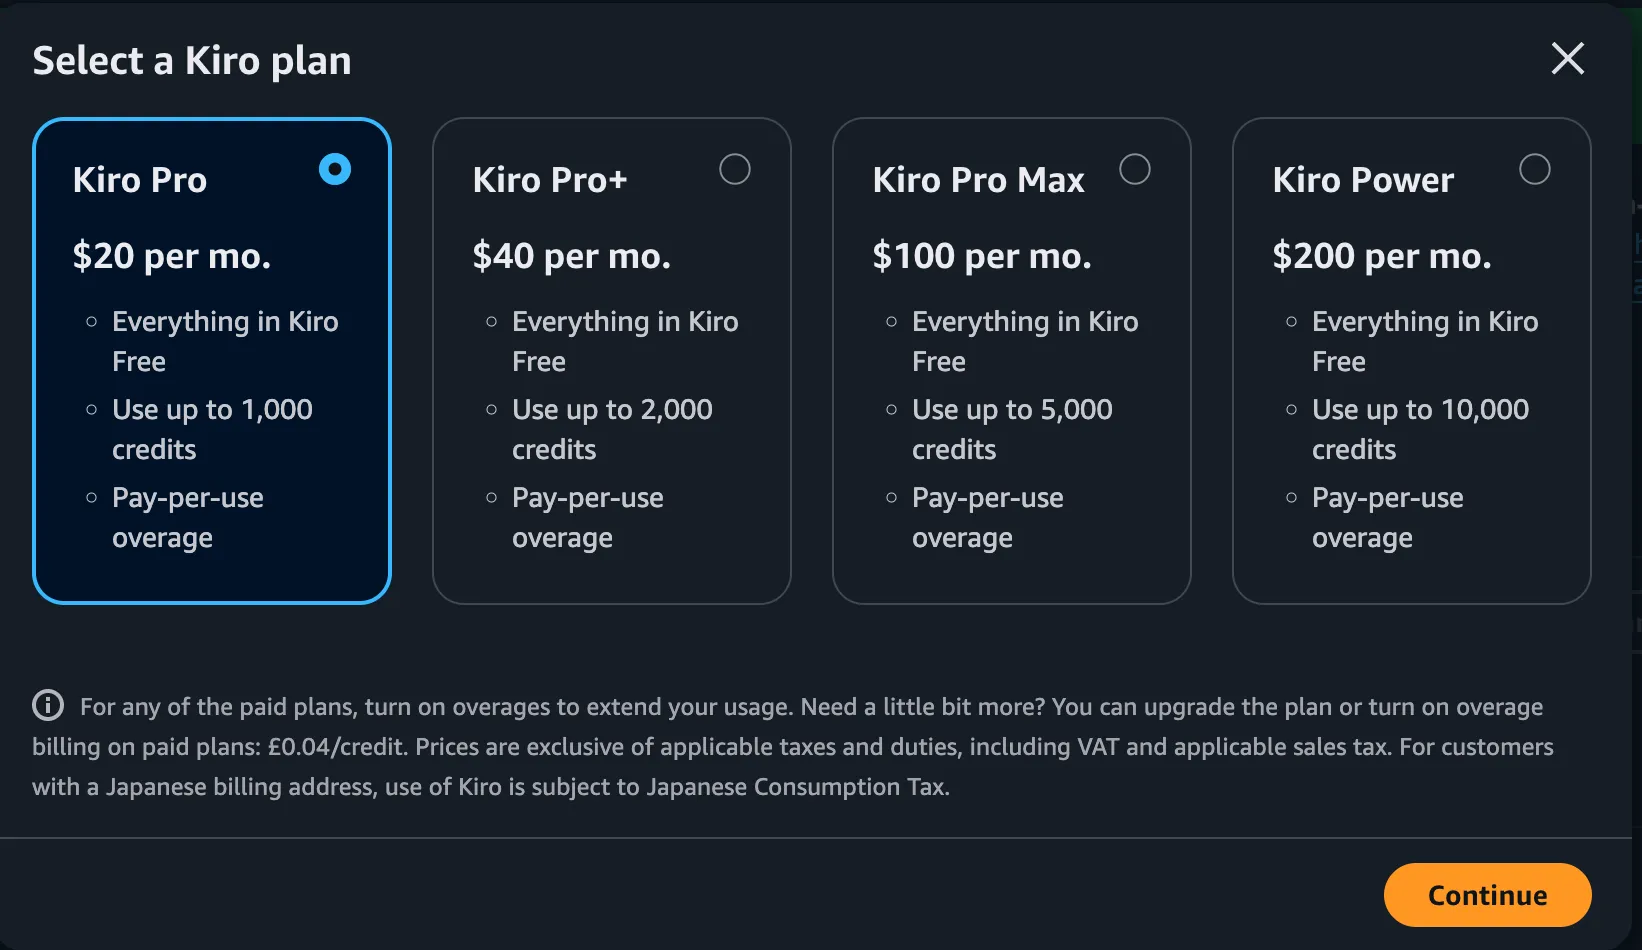
You can change the plan later from the Change plan button on the Kiro management page.
Step 6: Assign users
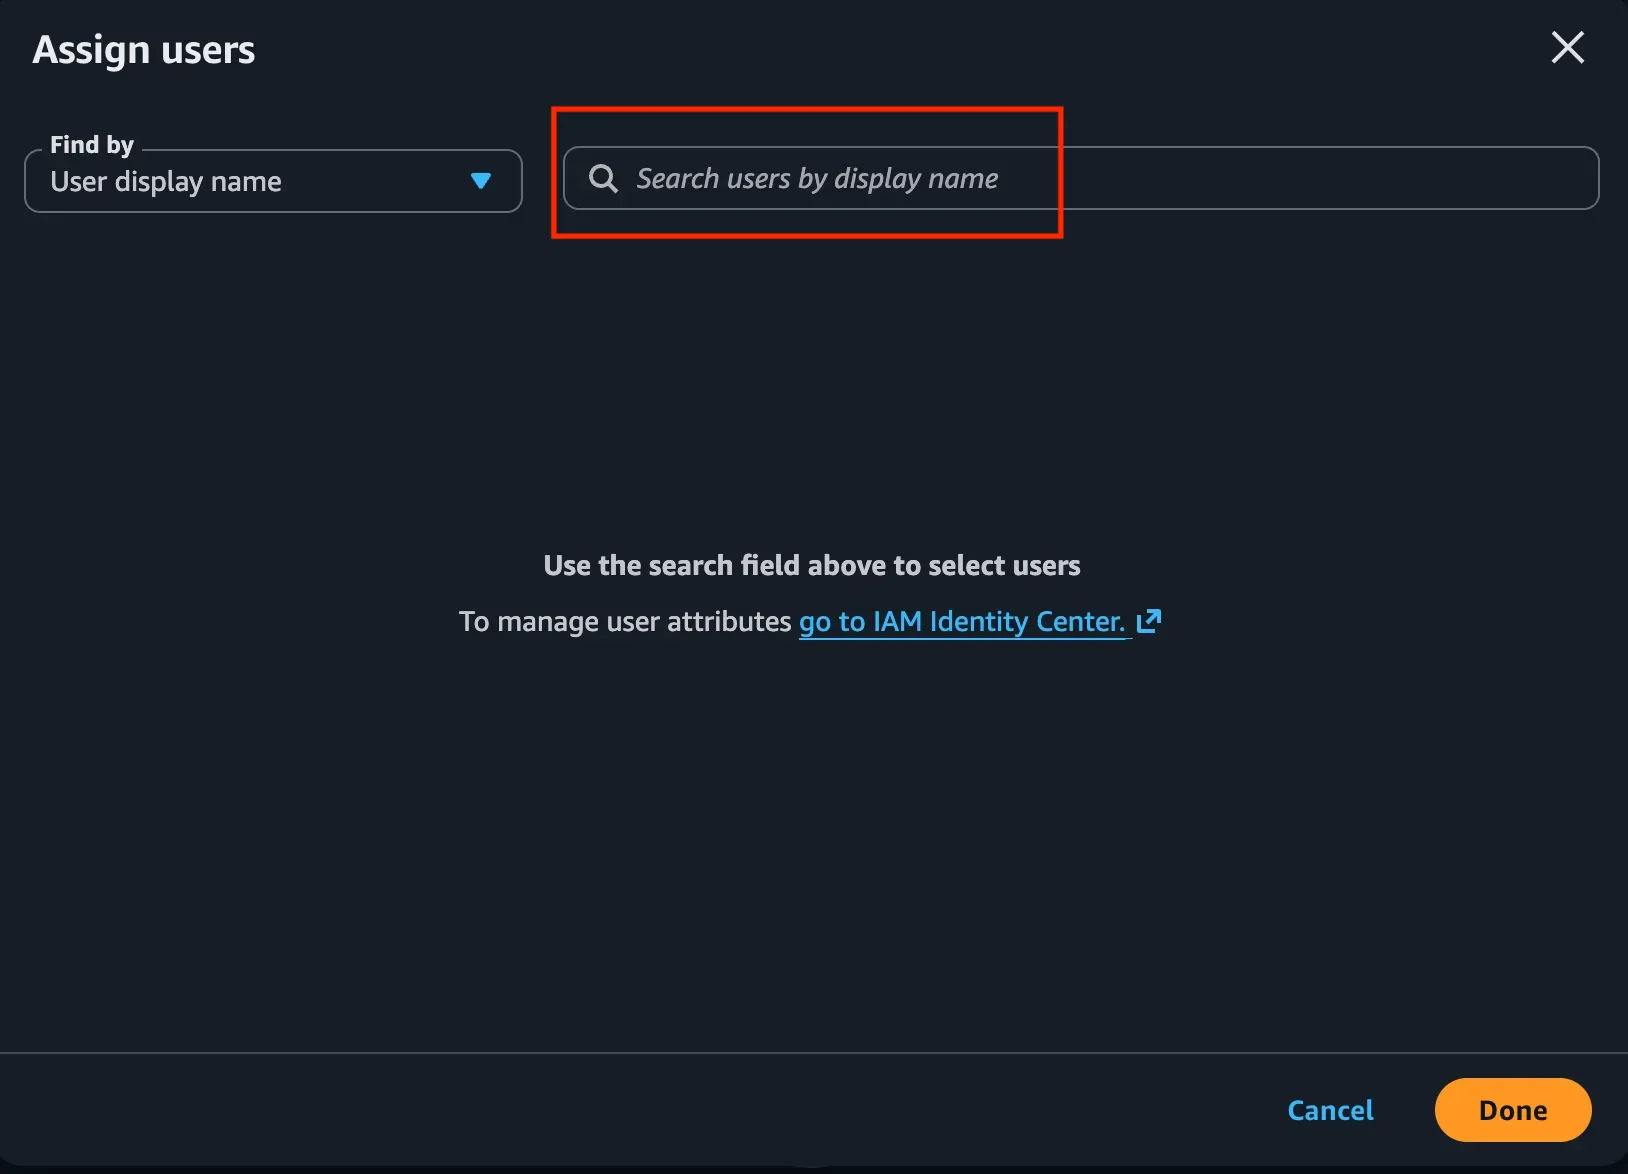
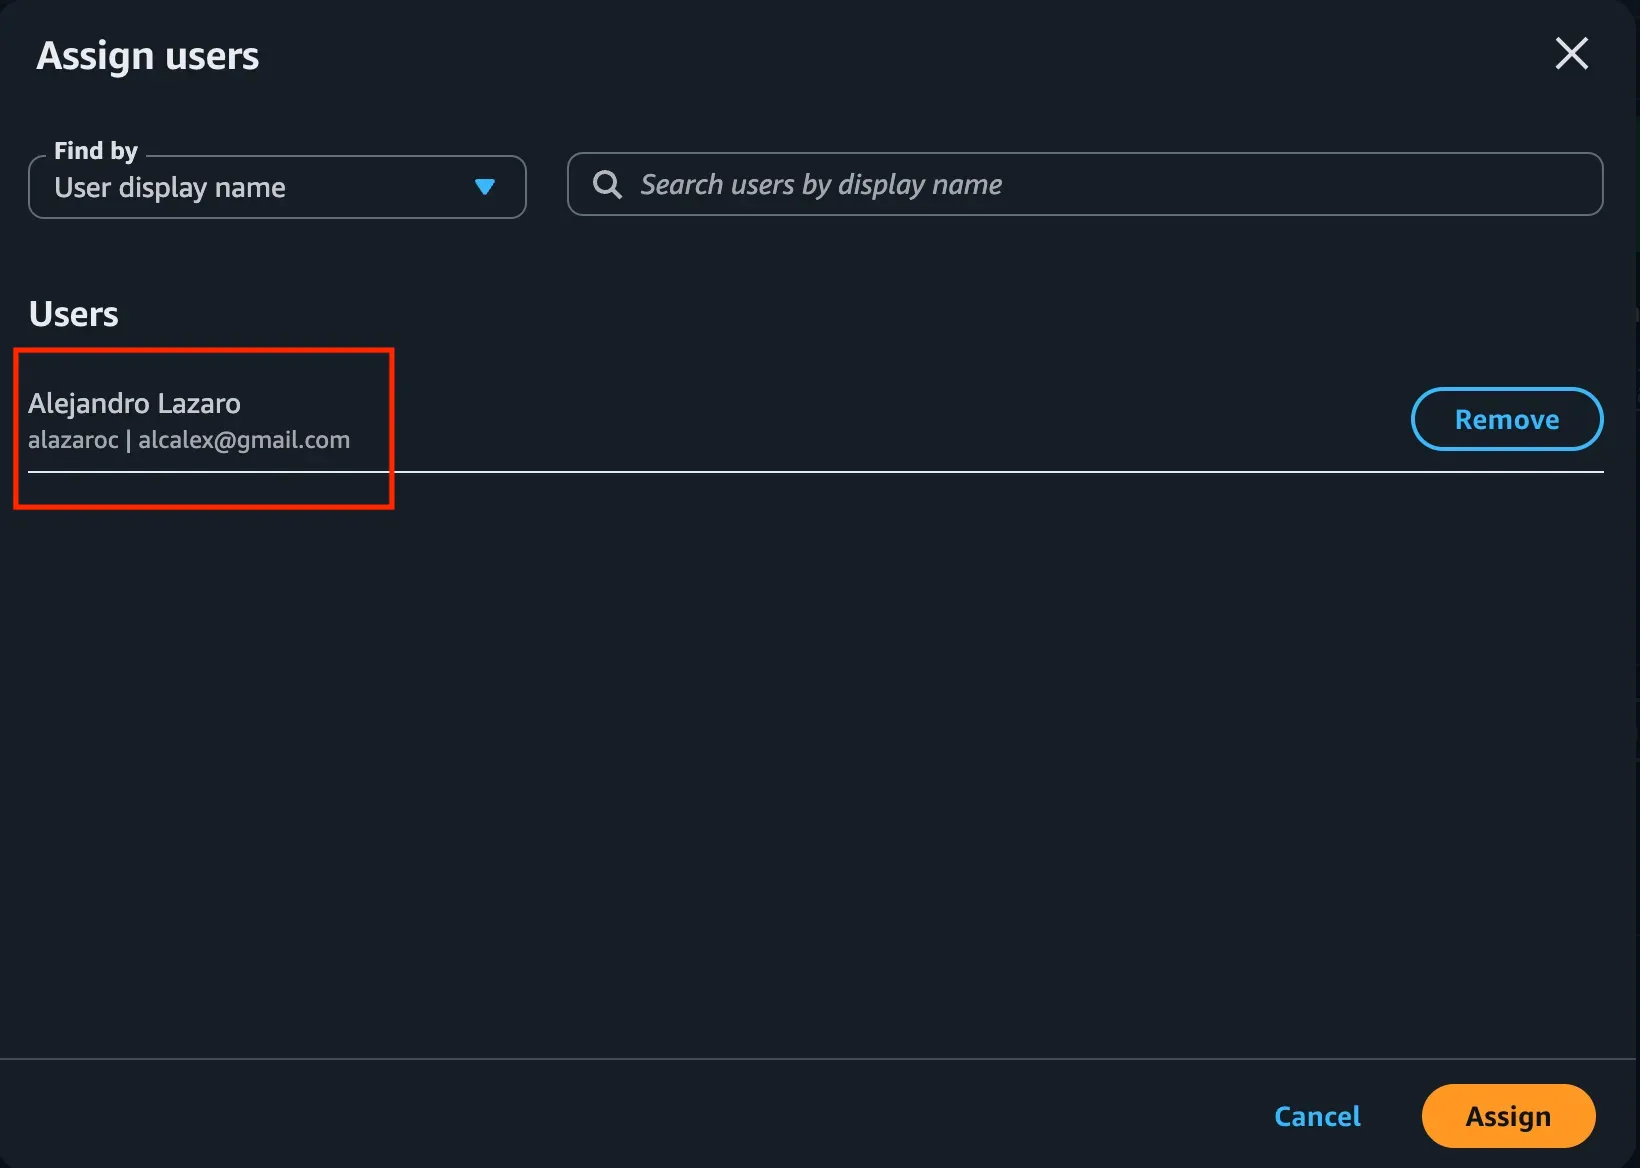
The Assign users dialog opens. Search by name for users already in your IAM Identity Center and select the ones you want to add.
Click Assign to confirm.
If the user you need doesn’t exist yet, create them first from the IAM Identity Center console (
Users>Add user) and then come back here.
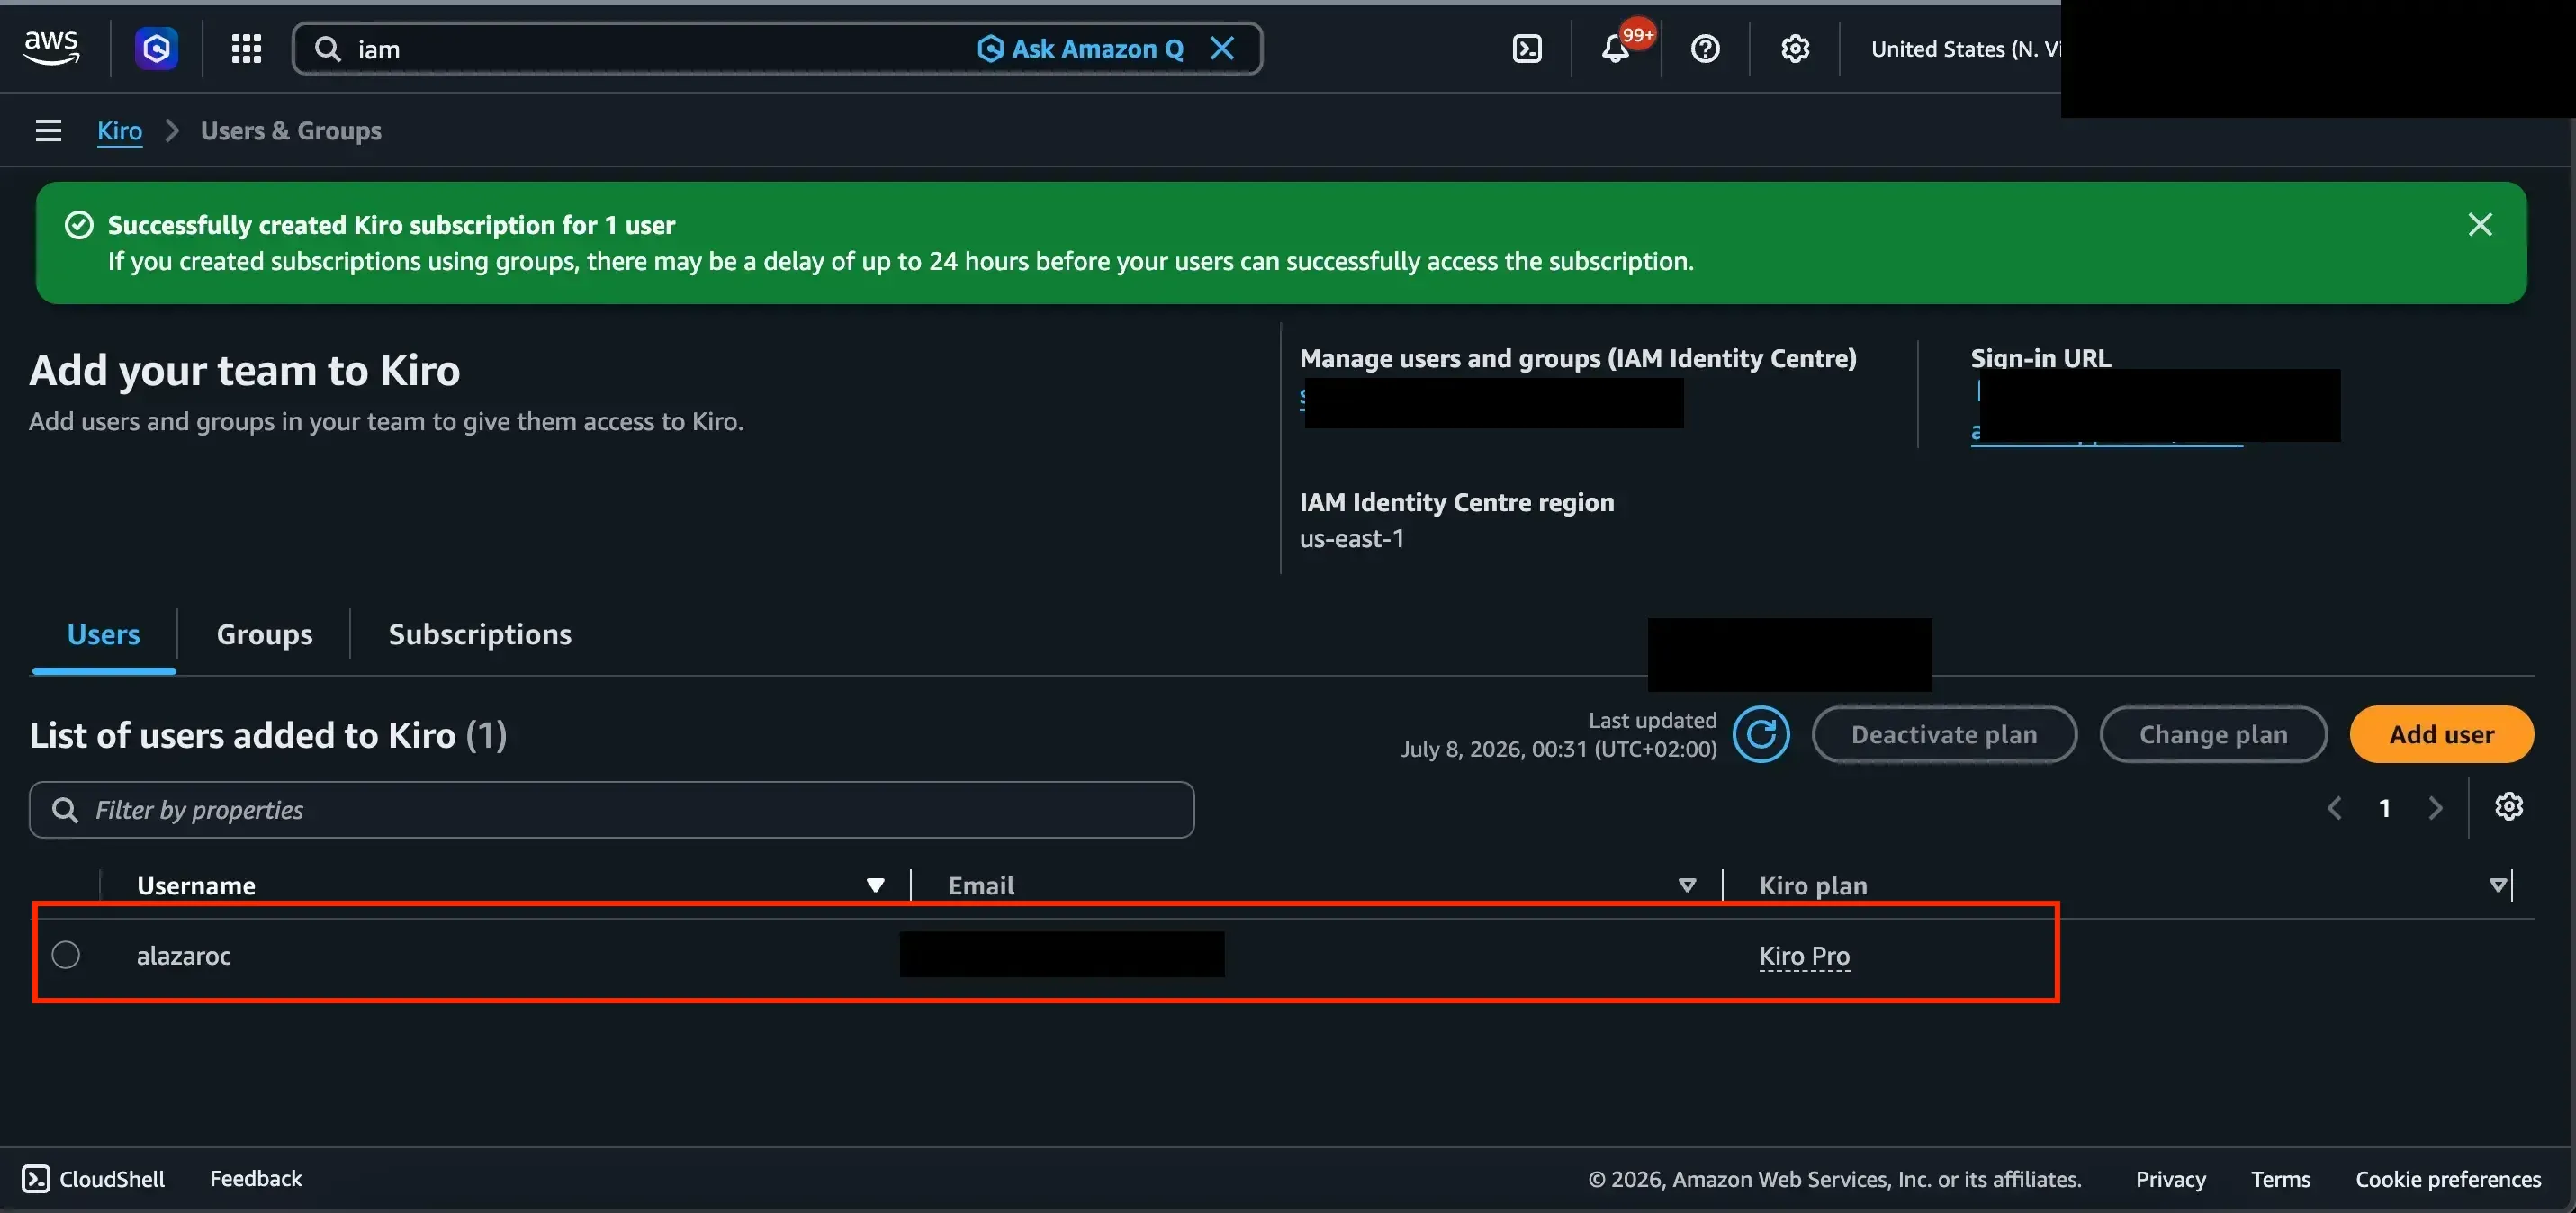
Step 7: Verify it works
Once you complete the previous steps, the subscription is created in Pending state. This means everything is configured, but the subscription doesn’t activate (or bill) until the user signs into Kiro for the first time.
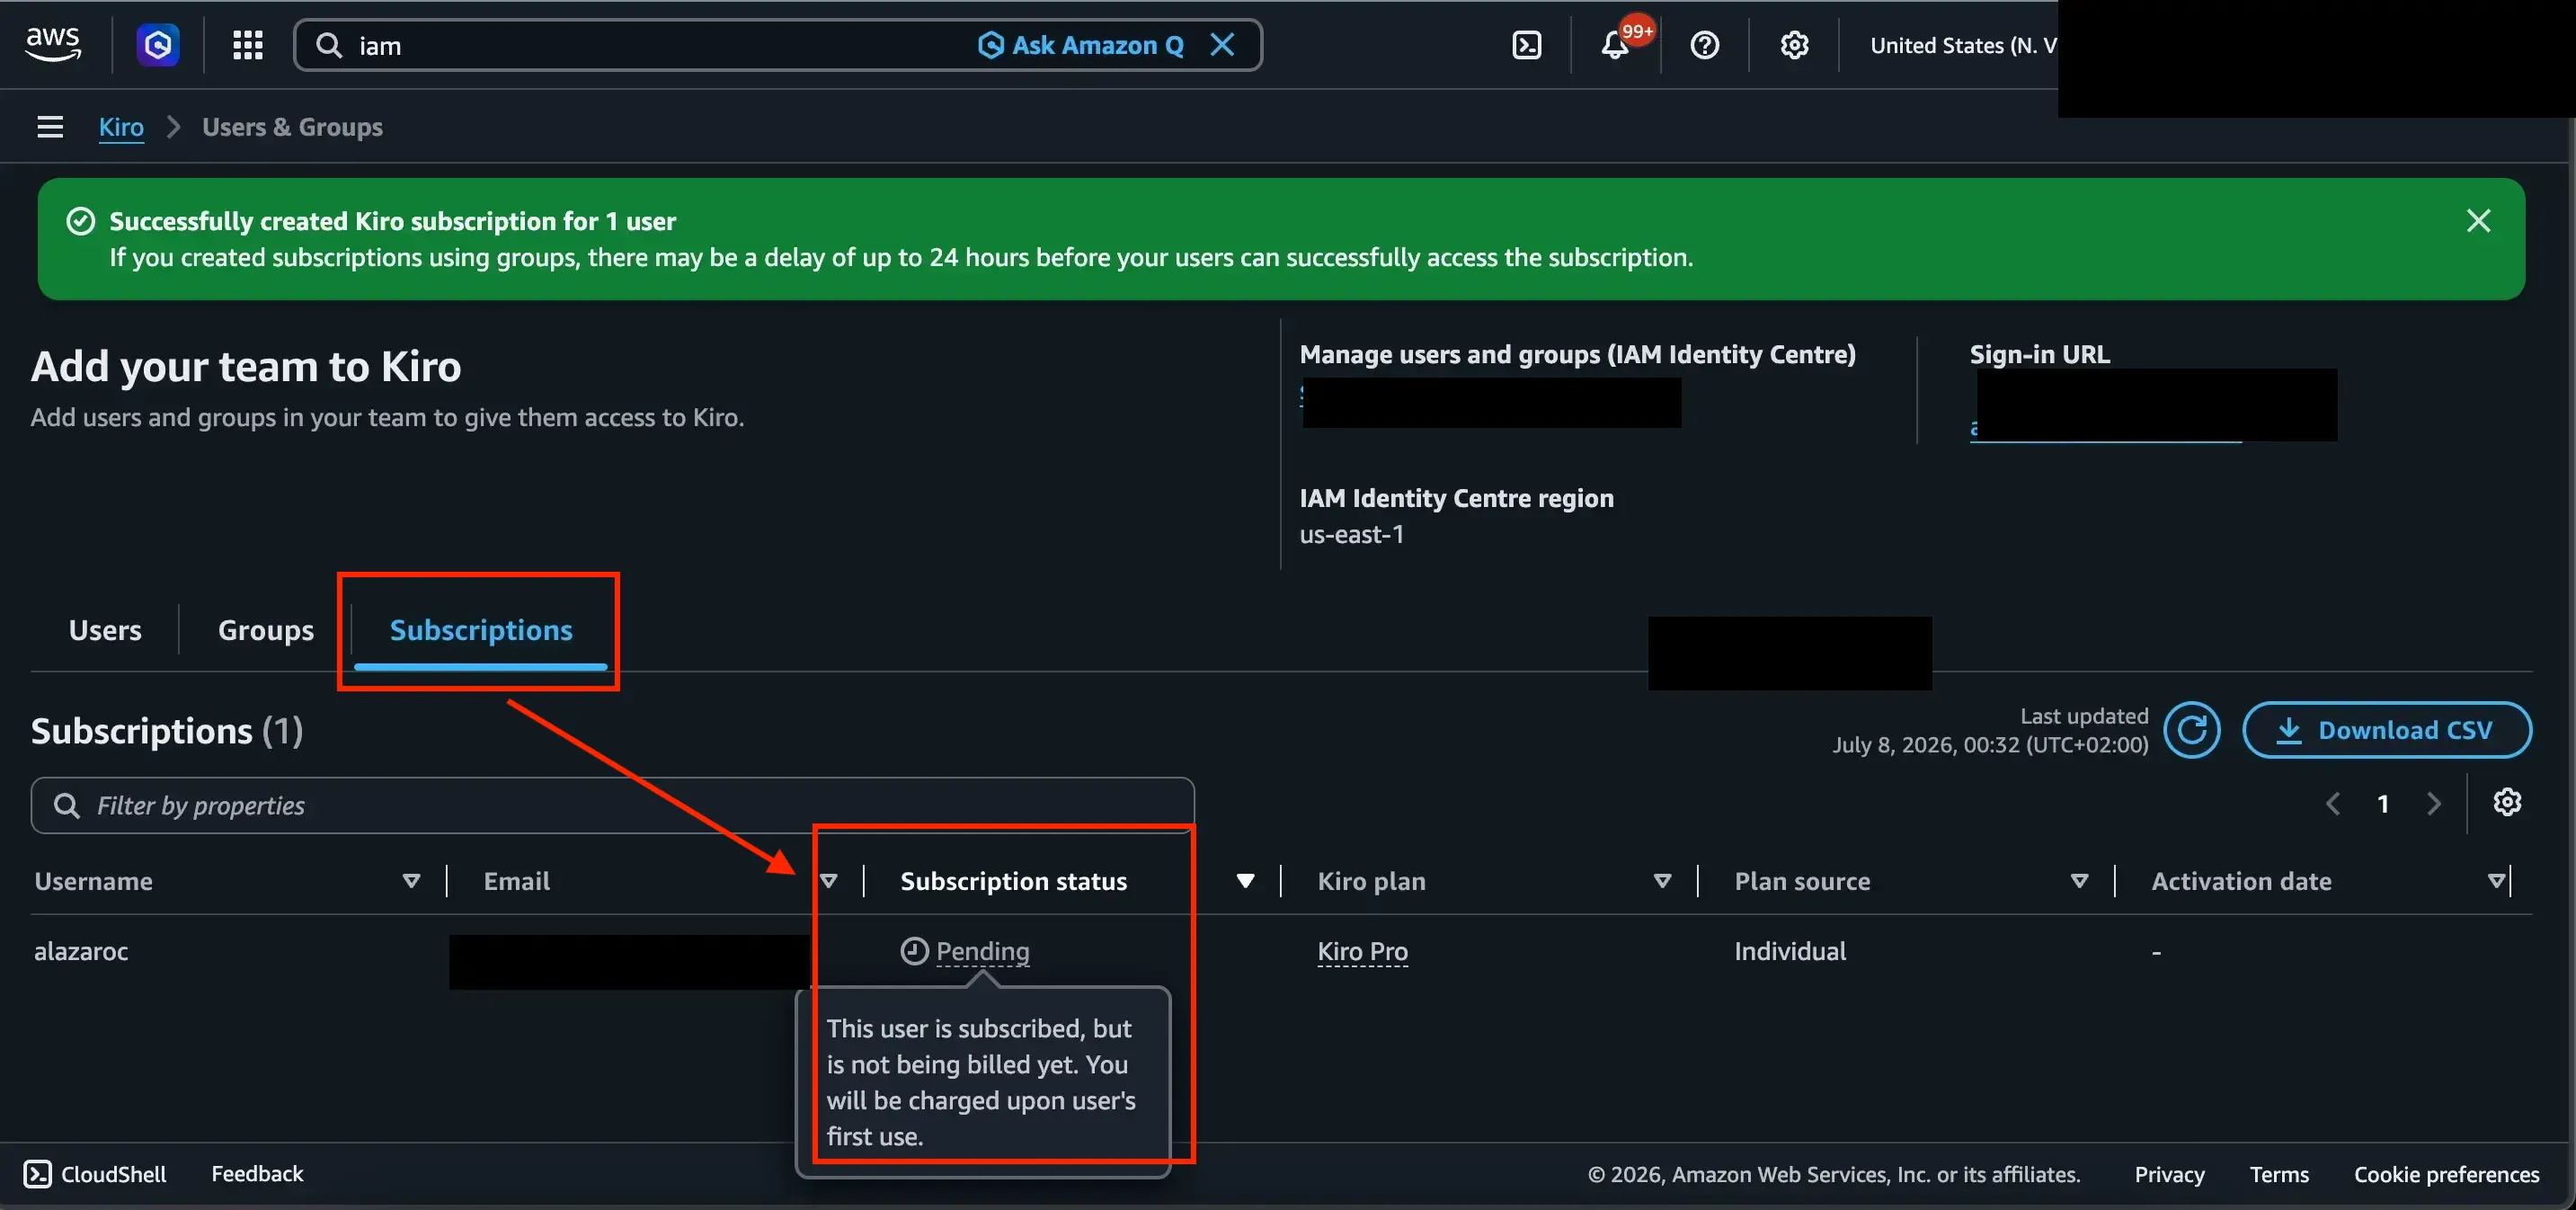
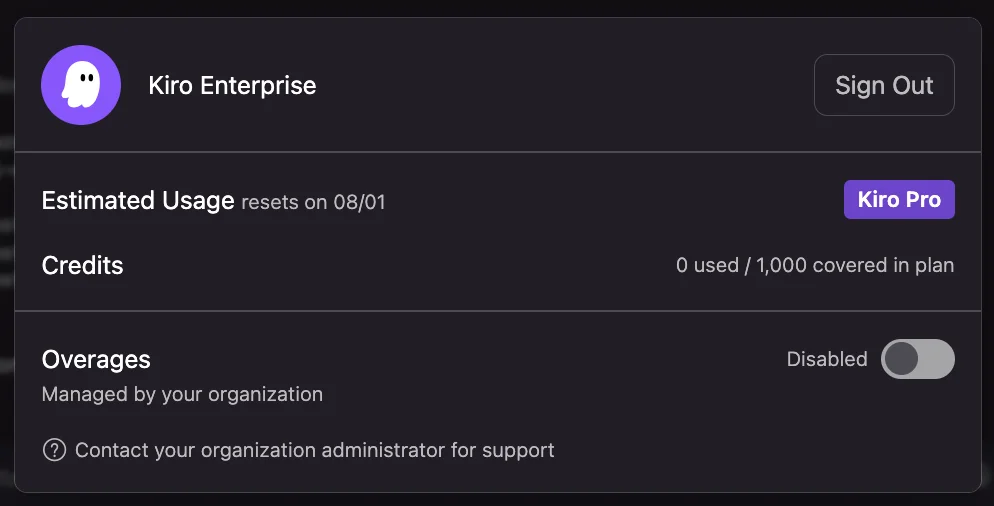
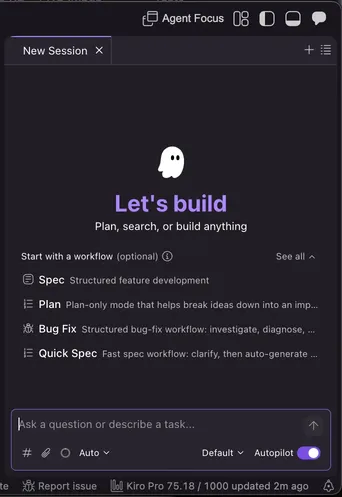
To check everything works, the assigned user needs to open Kiro and sign in with IAM Identity Center. Once they do, the status changes from Pending to Active and in Kiro’s settings they’ll see the organization’s plan is applied:
After setup
Adding more users
When you want to give access to more people, you don’t need to repeat the whole thing:
- Go back to the Kiro page in the AWS Console.
- Click Add user.
- Search and assign the user, same as in Step 6.
If the user doesn’t exist in IAM Identity Center yet, create them first from its console (Users > Add user).
Checking your users’ usage
From the Kiro page in the console, the Users & Groups tab shows a table with all subscribed users: their plan, status, and usage. Here you can see who’s using Kiro, who’s still Pending, and manage additions and removals.
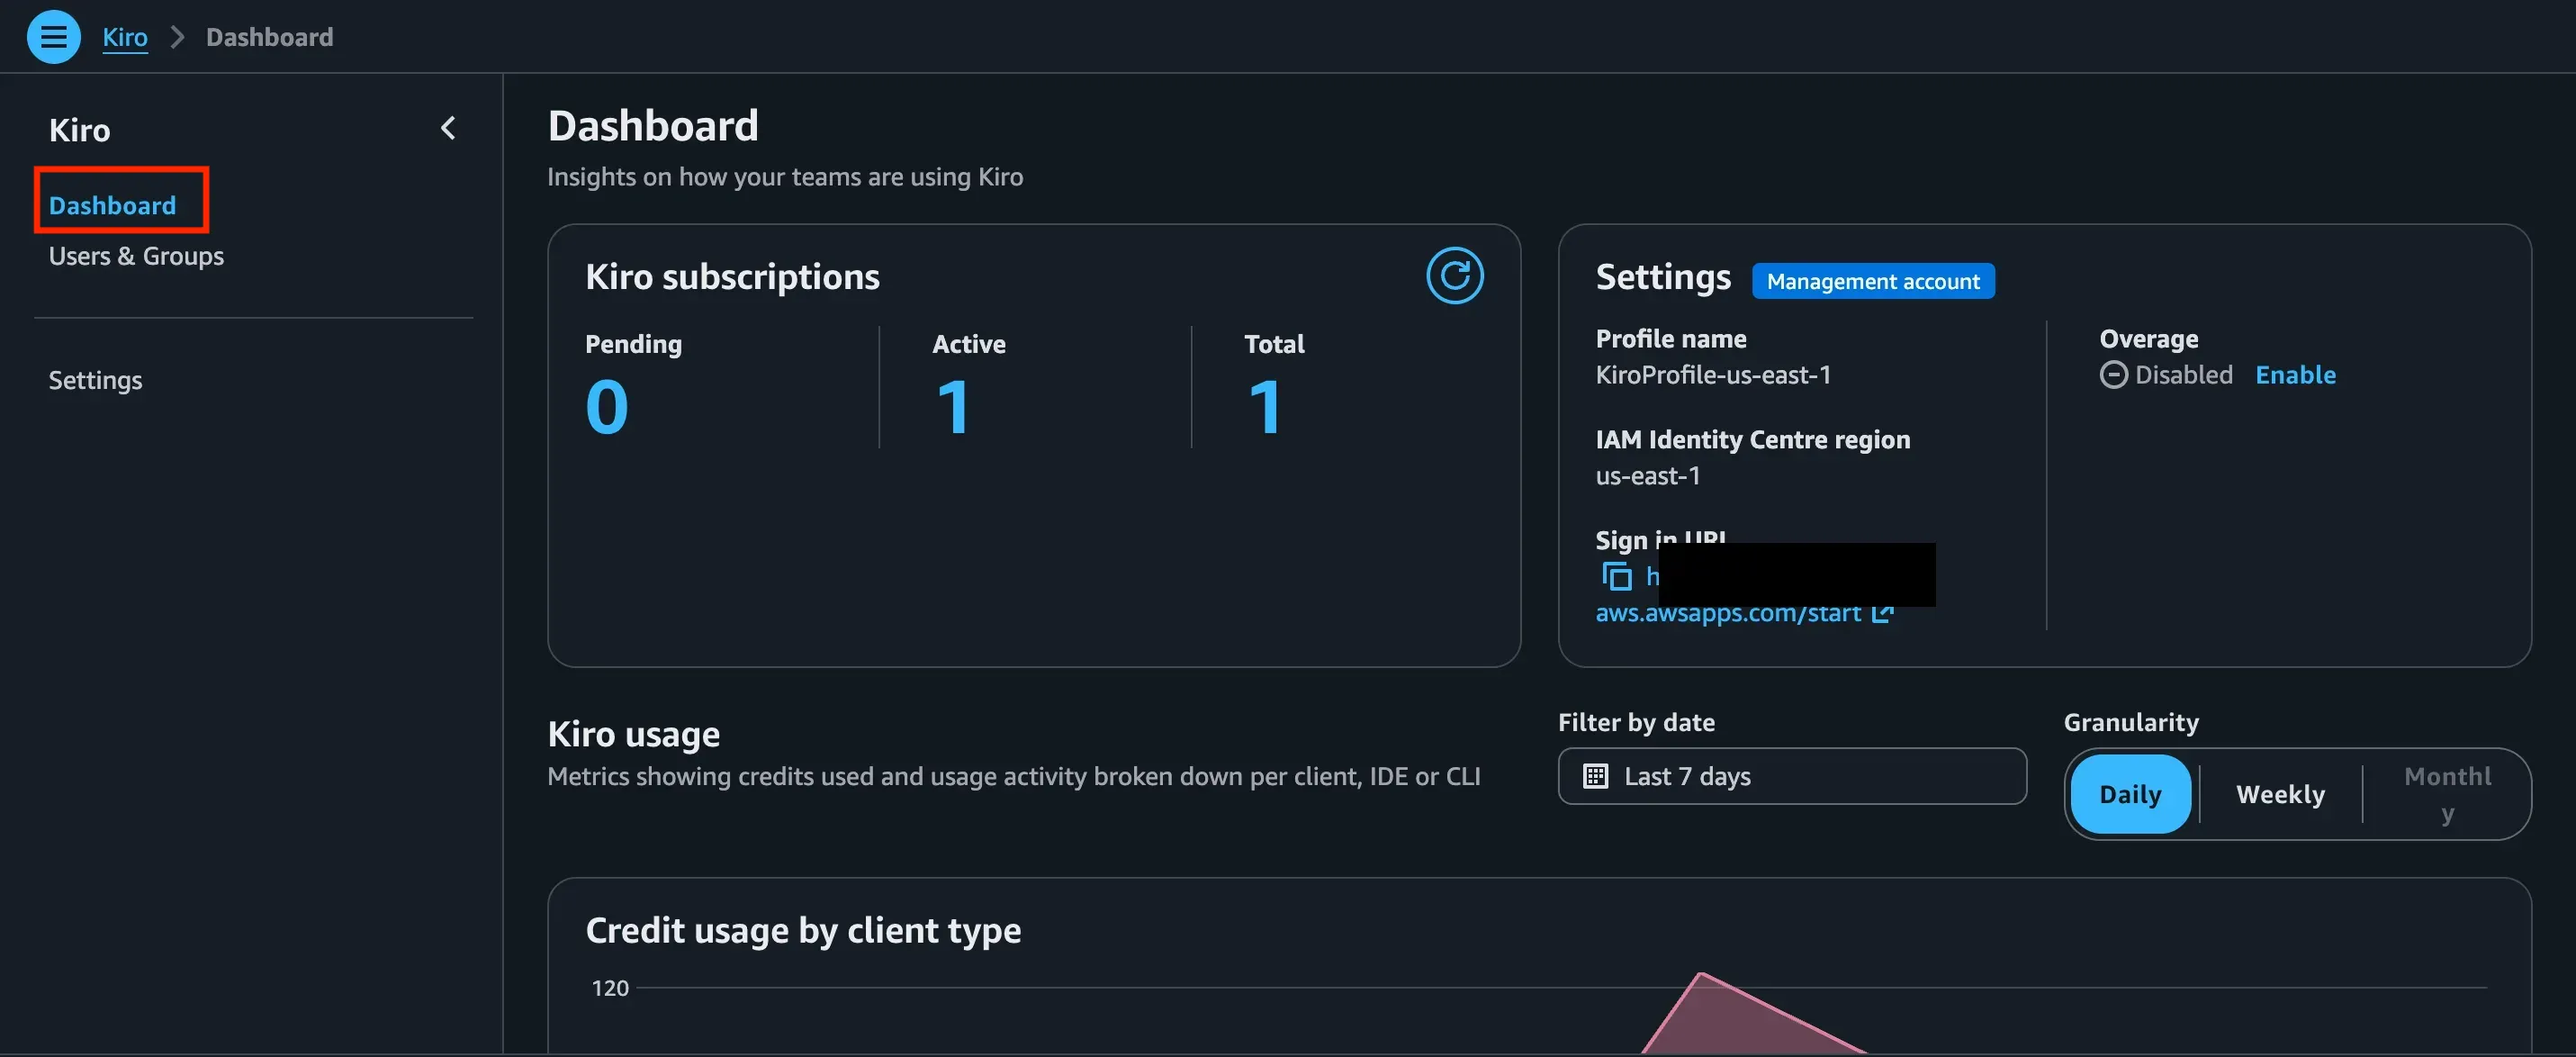
Extended sessions
Once a user signs in with IAM Identity Center, they don’t need to re-authenticate every day. The default session lasts 8 hours, but IAM Identity Center has a Kiro-specific option, extended sessions, that stretches it up to 90 days. In practice, your team signs in once and keeps working for weeks without anyone asking them to re-authenticate.
Extended sessions is a separate toggle from the general session duration of IAM Identity Center. Turning it on doesn’t affect how long sessions last for your other SSO apps.
Cancelling mid-month
This can catch you off guard.
If you unsubscribe a user from Users & Groups (the Deactivate plan action), access is cut immediately. There’s no grace period until end of month. But you still get charged for the full month. The cancellation only stops next month’s charge; it doesn’t refund or prorate the current one.
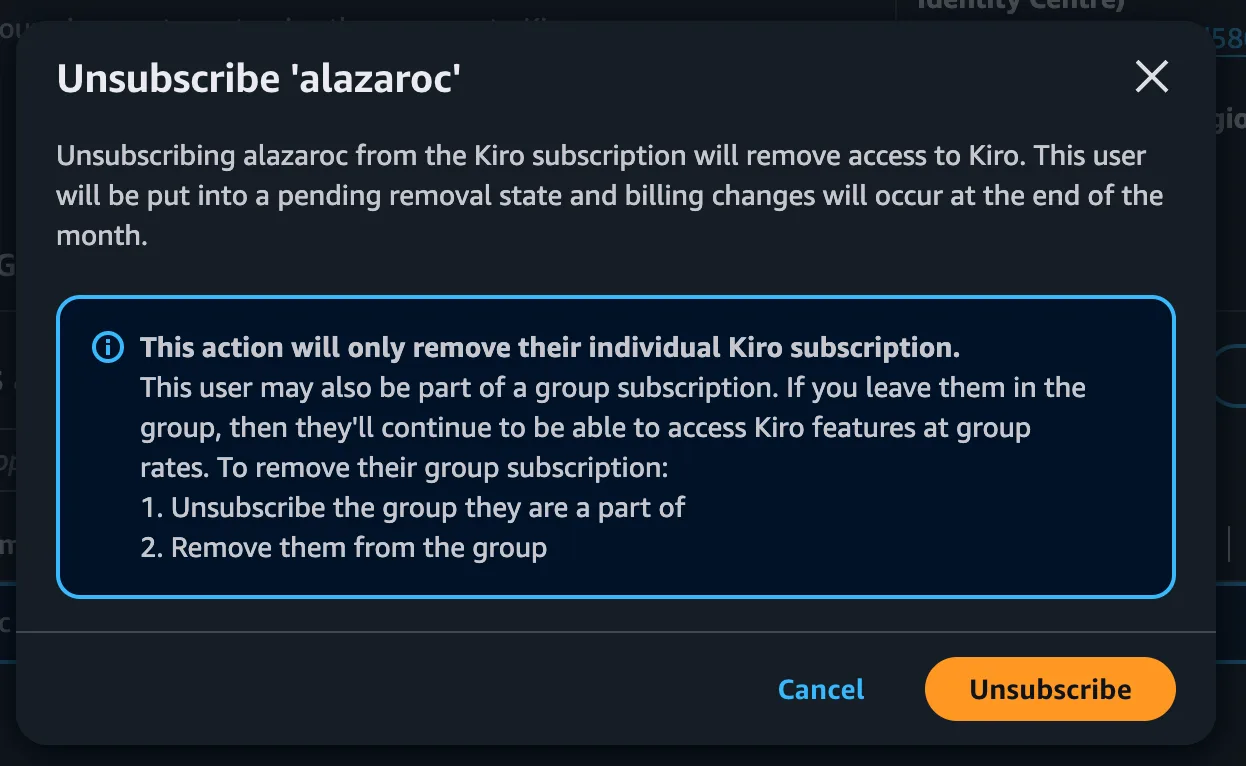
This is different from cancelling an individual Kiro subscription (outside Organizations), where you keep access until the end of the month you already paid for. With Identity Center-managed subscriptions, access and billing are decoupled: access ends when you deactivate the user, but the current month’s charge has already been made.
If you’re offboarding someone, deactivating their plan doesn’t save you money that same month. Time it around your billing cycle if you want to minimize costs.
Conclusion
You’ve got Kiro enabled with IAM Identity Center. Charges show up on your AWS bill, authentication goes through SSO, and you can add or remove users whenever you want.
If a user can’t sign in, check that they’re assigned under the Users tab and that they’re using the correct information from your SSO page, including the region.